Mods
This week, I got to experience something of interest: I created a Minecraft modpack.
What started this? #
“What started this?” you may ask. Well, I decided to play some vanilla Minecraft to see what the new version hype that always happens was about. I am used to playing on a modded Minecraft server with my friends, which has 300+ mods that make the game something different. When I spun up the vanilla instance, I habitually tried to use some of the mods that didn’t exist… you can imagine how that went for me. So, what did I do? I decided to create an overcomplicated solution to something that should not be an issue (this is how my brain is).
I created a modpack with some things that I think should be in vanilla. This pack has mods like Jade, JEI, improved animations, shaders, and some other quality game essentials (downloadable at essentials.fuzzsgrill.com). When I started to investigate installation, I saw that I could use Modrinth for it. It’s super easy and should be good to go.
Well, after some trouble, I decided to make the app do it. A good friend/software dev saw me using Modrinth on Discord and asked what I was up to, and I told him I was creating a mod pack for the necessities. I was able to get the modpack created and running, but when I saw how bad it was running, I gave it more RAM to use (Modrinth auto-allocated to about 2 gigs of RAM). After I adjusted it, the game was constantly crashing, so I decided to give up on that pack and create a new one.
Shopping around on Modrinth is something of interest. You have most mods imaginable. It is nice, too, as Modrinth will download dependency mods if needed. When I was done, I sent it to my brother for him to check out.
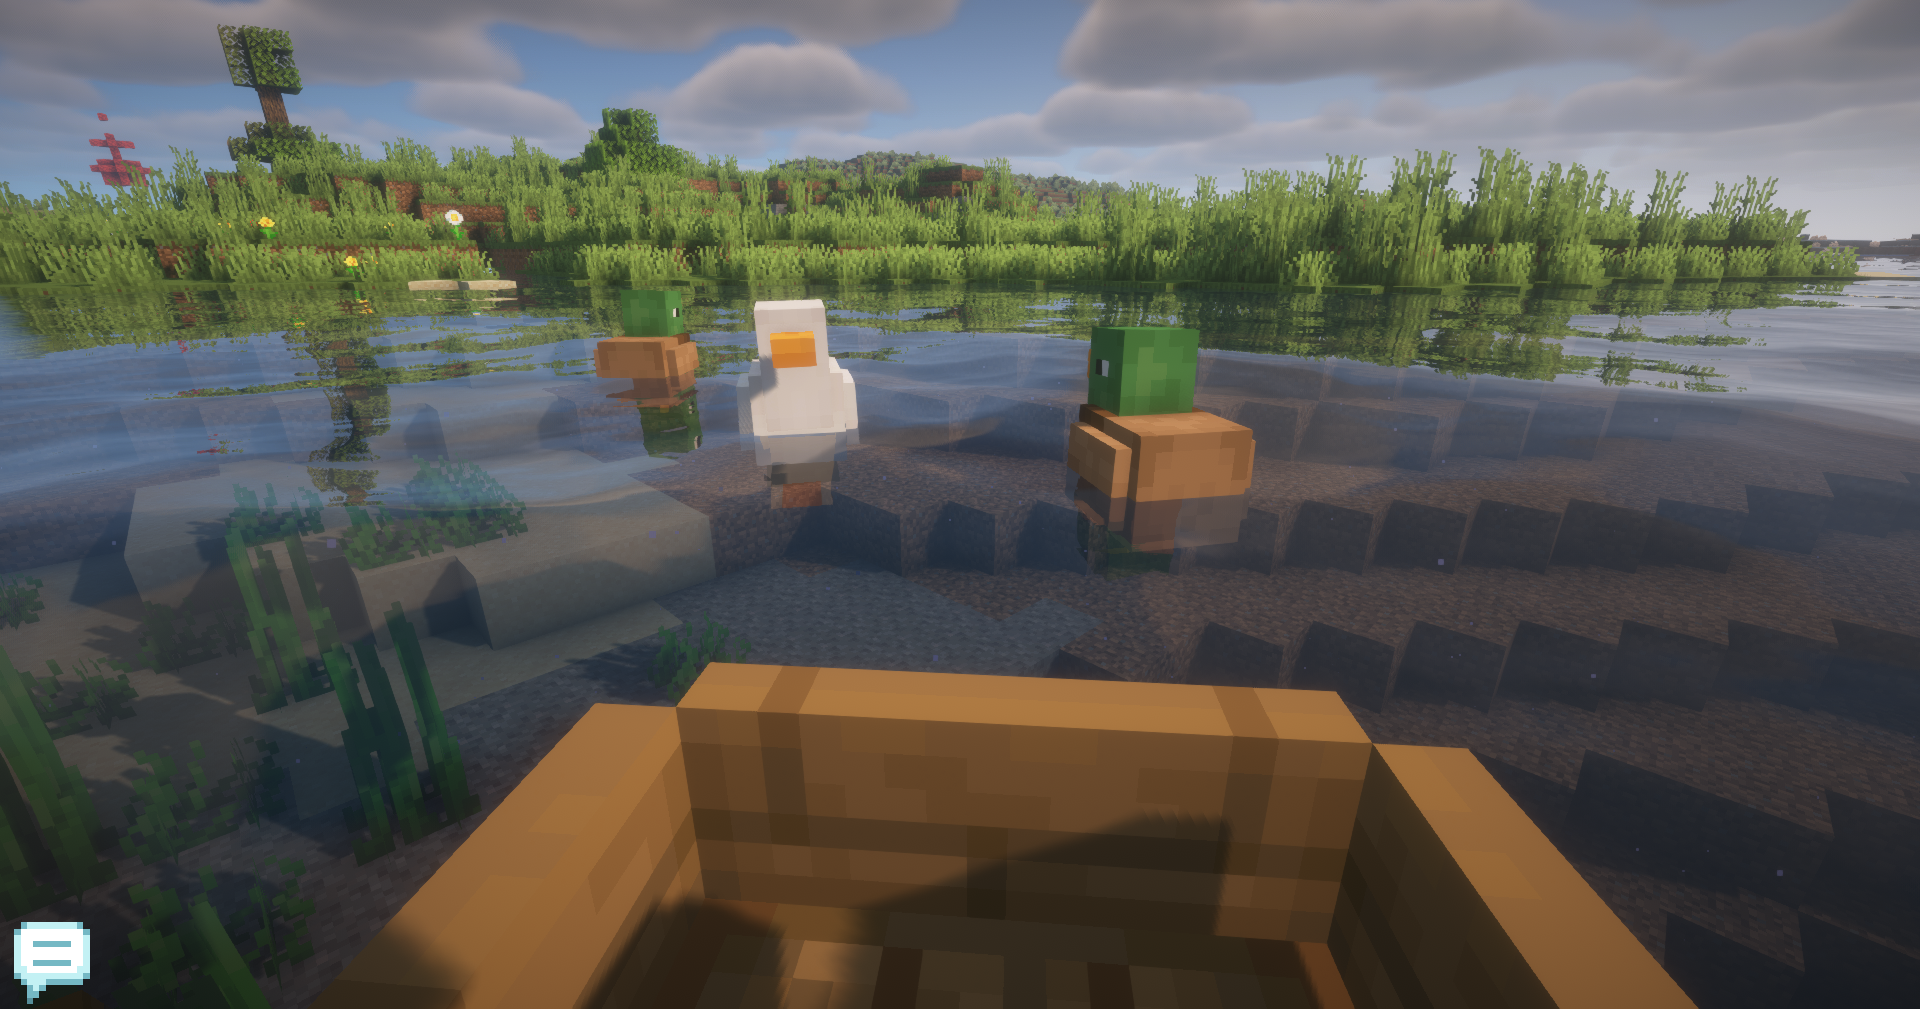
This next part I am not sure how happened, but I was on a call with another good friend and we somehow brought up ducks and Minecraft. I told her I added ducks to the game (via the mod Duckling). When she said “I got to see this”, I decided to send her the pack so she could see it for herself, along with a screenshot with a raft of ducks happily quacking and floating around.
My software developer friend chimed in with a system called Packwiz, a better way to distribute these modpacks. Plus, the server that I play on uses Packwiz for its distribution. He sends me a link to its documentation, and I got started that next night.
Oh wow, that was interesting…
Technical details #
I use a system called the Windows Subsystem for Linux, which essentially puts the Ubuntu terminal in Windows’ PowerShell. It’s an amazing tool - I am not a total stranger to Linux, but I want to get better with it, so I went with it.
I could not figure out how to install Packwiz in WSL, so I called on my friend and he helped explain it to me and install it. It turns out we needed to use the wget command followed by the Linux binary URL to download it. Once it got installed, he showed me around.
I created and cd‘ed into a new directory for the modpack, then ram packwiz init, to begin setup. After asking me some questions, it created the pack.toml and index.toml. With those in hand, we set up a Netlify system to deploy this. Then mods were added and off everything went.
I got stuck a lot during the way due to the documentation being written in a strange way. Luckily, my friend is an expert in this and helped me through the setup. The part that I got lost on was adding the URL that the pack.toml was located it at. I forgot that the Netlify deploy was that toml file. With that new knowledge, I updated the URL that was needed, and everything worked.
There were some minor difficulties, as I downloaded a bootstrap file twice and entered the wrong command. I sent the errors to my friend and then immediately fixed them as I found what was wrong. A bit embarrassed, I messaged him back with “fixed it lol” and a screenshot of the home screen of Minecraft. He laughed and then explained the art of “rubber duck debugging” where developers have little rubber ducks on their desks to help debug their code. Here, he served as my duck.
Now that everything was good to go and working, I deployed it to Google Drive and figured out how to create it as an auto download and a much prettier URL.
Step-by-step #
Without further ado, here is what happened (in WSL):
Creating the pack #
-
Make sure that you have
goandgitinstalled. -
Use
wgetand the Linux binary URL to download and install Packwiz. -
Create a new directory and
cdinto it make sure that it is named something you can remember (e.g.Minecraft_mods_1.0). -
Run
packwiz initto activate Packwiz and create the modpack. -
Go to Modrinth and pick out mods that you want. As you choose them, run the following command:
packwiz modrinth install mod-name-or-url -
It will install the mod you specify, along with any needed dependencies. If you used the name of the mod, choose the option that you want (it will number them).
-
Make sure you commit and push to GitHub often (and use branches):
git checkout -b branch-name git add . git commit -m “example message” git push origin branch-name -
When you are satisfied with your branch, merge it to main with:
git merge origin main
When you are done, move on to deployment.
Deploying the pack #
Here, things are going to get strange. You will want a Netlify account.
-
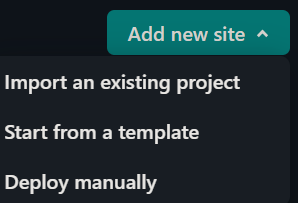
In Netlify, click on Add new site and Import an existing project. Choose the GitHub option to import your project.
-
Sign into GitHub and choose your repo.
-
Scroll down to Branch to deploy. Make sure it’s set to
mainand set Base directory to/.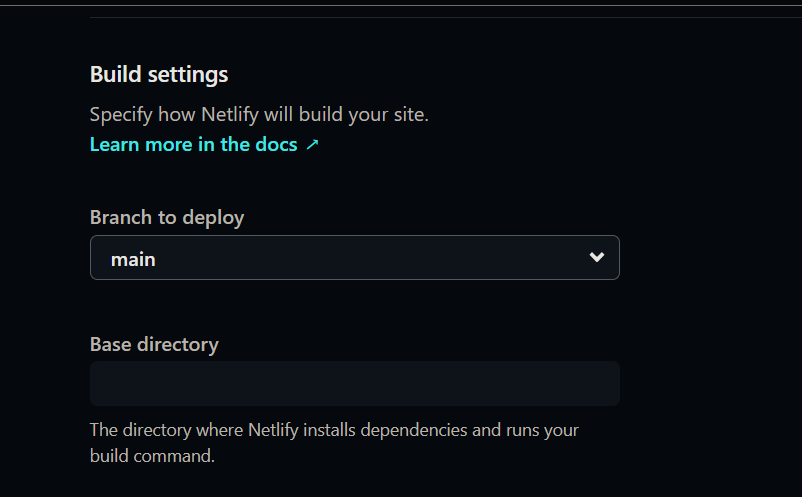
-
Then hit Deploy under everything. This will deploy your
mainGitHub branch. Copy your deployment URL when it’s done. -
Use Prism Launcher or MultiMC to spin up a new instance of Minecraft.
-
Choose your Minecraft version and what mod loader you are using (Fabric, Cloth etc)
-
Under custom commands, enter:
"$INST_JAVA" -jar packwiz-installer-bootstrap.jar https://your-server.com/pack.toml”
Replace the URL with the one you copied from Netlify.
-
-
You will also want to grab this bootstrap file for Packwiz. Move that to you instance
.minecraftfolder (it will appear after you hit OK).An easy trick to find your instance folder is to hit the Folder button with the instance selected.
Grab that bootstrap file that you downloaded earlier and move it there.
-
Now, everything should be good to go. Press Launch and start playing.
If you want to share your modpack with others, use the Export function in Prism and send that to them. The pack will auto-download and update whenever there is a change.